Virtualization with Arch Linux and Qemu/KVM - part 4
Introduction
Now with the physical hosts setup to be used for virtualization I can finally install and setup the Virtual Machines (VM). On my laptop I install Virtual Machine Manager (or virt-manager for short) to manage the VMs on the hosts I prepared. As before my laptop is also my Ansible controller host.
Connect to libvirtd on the physical hosts
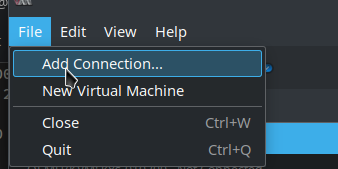
Lets start virt-manager. If you don’t have any Virtual Machines managed by libvirtd installed locally you should just see an empty list of VMs. To add connections to all Physical Hosts click File / Add connections... on the menu:
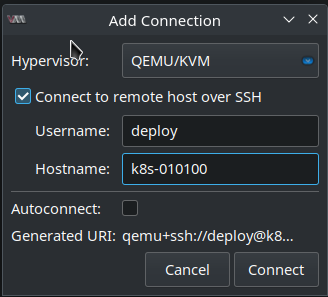
Hypervisor should already be set to QEMU/KVM. Click Connect to remote host over SSH. Username will be deploy (the user I created in the previous blog posts and added it to libvirt group). The first hostname will be k8s-010100. So the window should look like this:
This needs to be done for every Physical Host so that I finally have three hosts in the list of virt-manager:

Setup libvirt Storage Pools
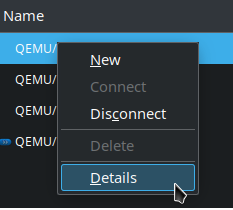
The next part also needs to be done for all three hosts but I’ll just show it for one (k8s-010200). For the others it’s just the same. First some storage pools need to be added. Right mouse click on one of the hosts, click Details and the Storage tab:
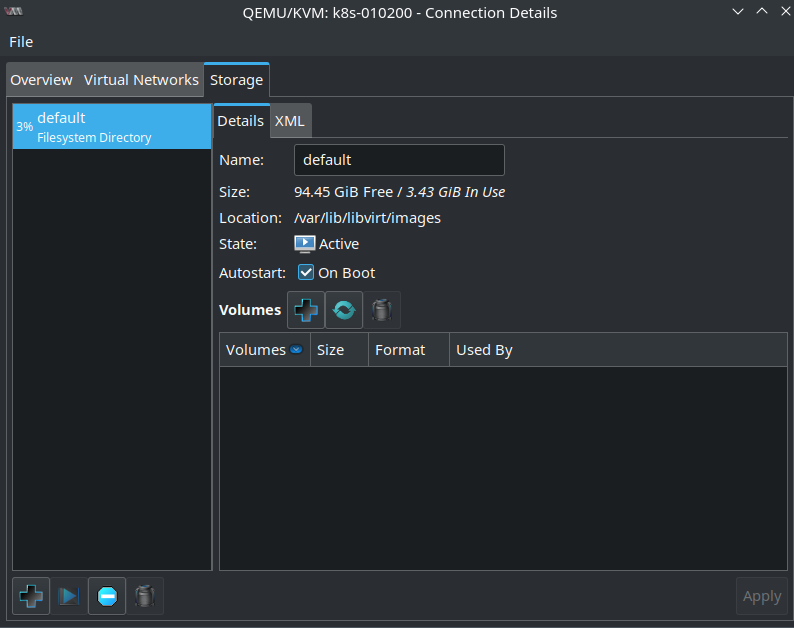
Currently there is only a default pool. By default all qcow2 VM images are stored there. But since I’ve LVM storage only it’s not relevant:
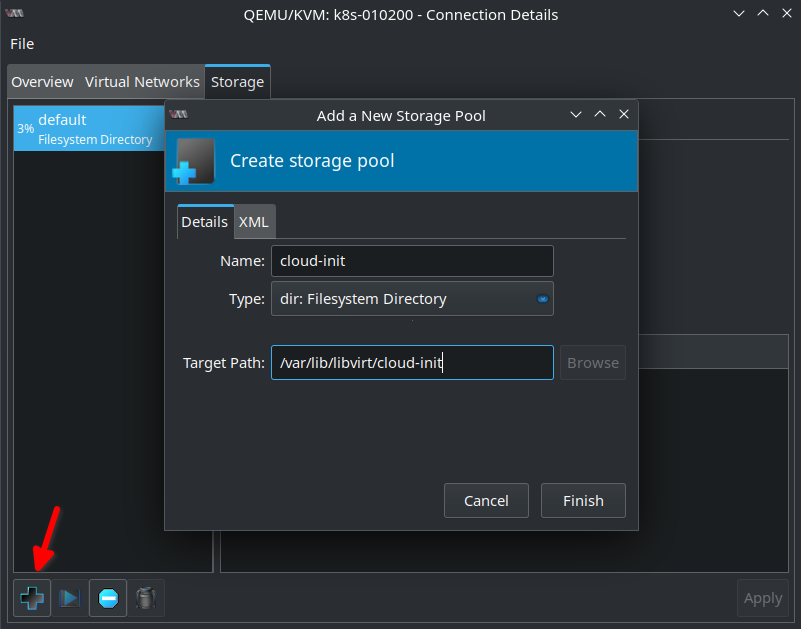
First I need a storage pool for the cloud-init .iso files I created in the previous blog post. As you might remember they contain all the information needed to configure a VM during startup. Click the + button on the lower left. Name the pool cloud-init e.g. Type is dir: Filesystem Directory. The directory is /var/lib/libvirt/cloud-init:
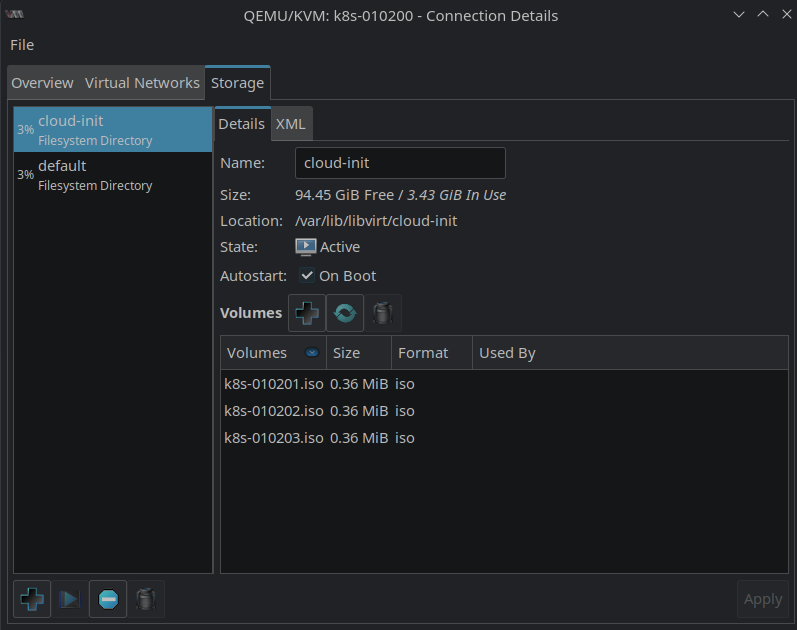
After clicking Finish one should already see a list of the .iso files that were copied to the host:
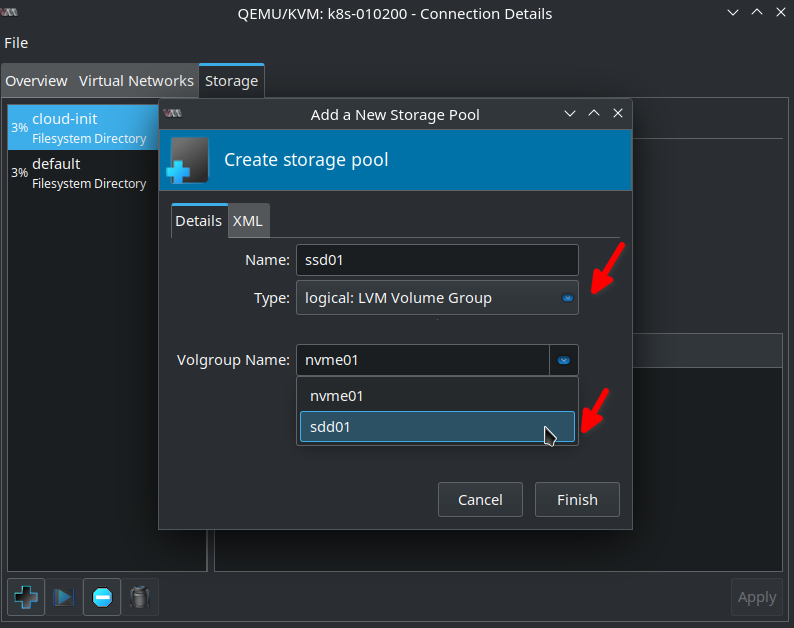
The next storage pool is called ssd01. But this time the Type is logical: LVM Volume Group. The Volgroup Name is ssd01:
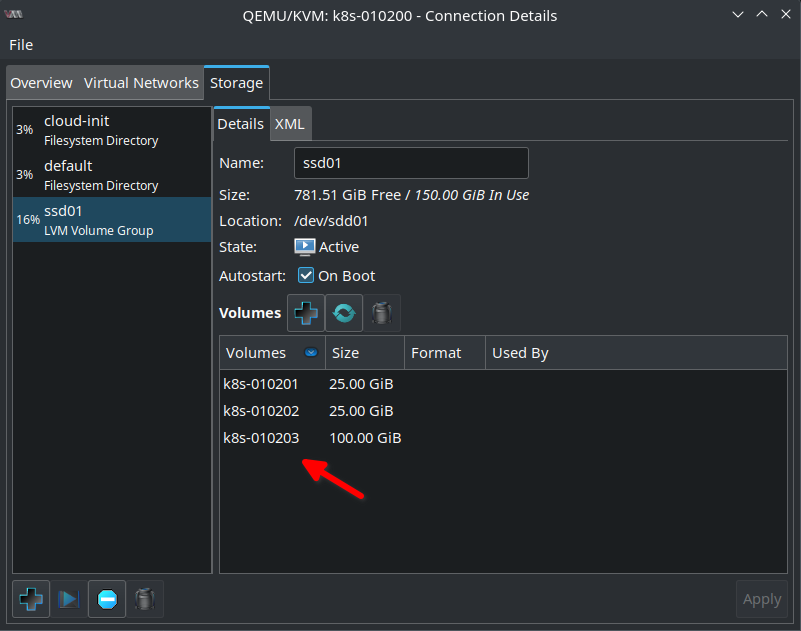
After clicking Finish in the Volumes list there are already three volumes I created in the previous blog post:
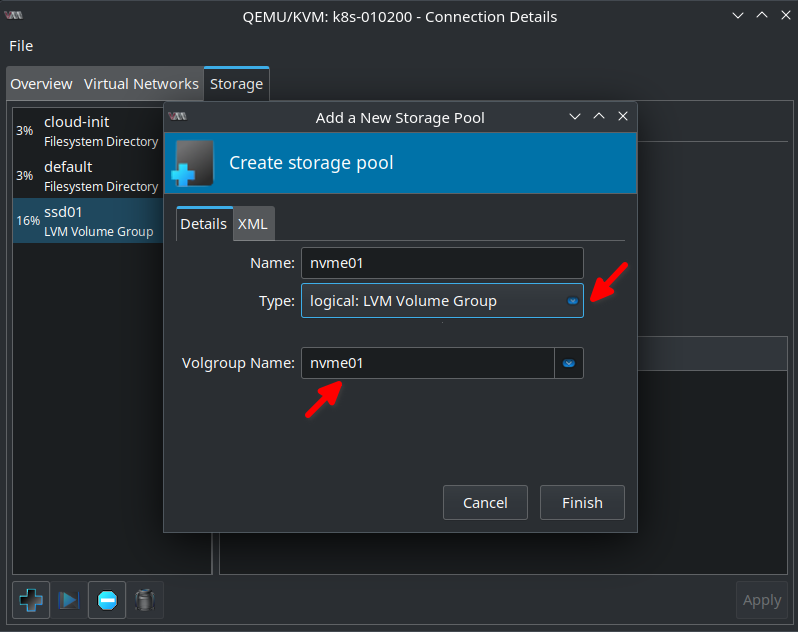
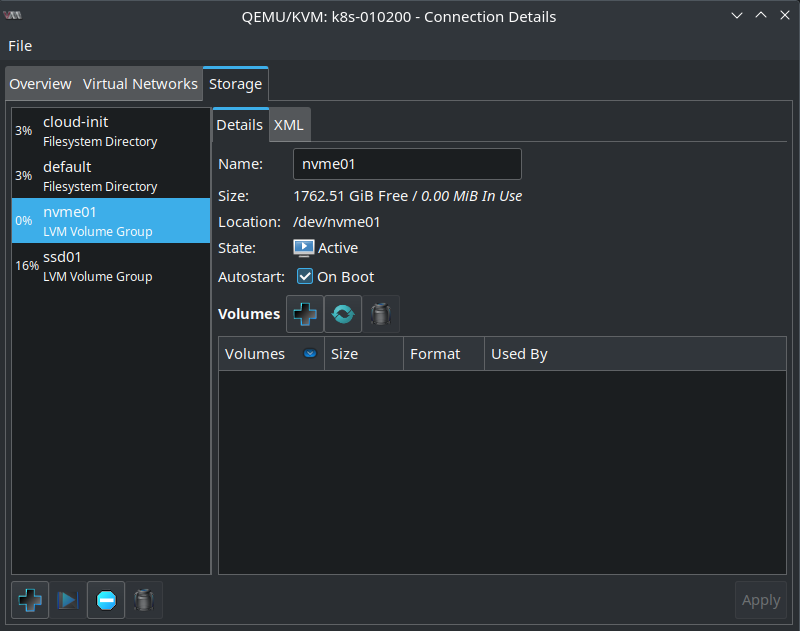
And finally I create the nvme01 Volume Group which is currently empty as I haven’t created any volumes there yet:
Install and configure Virtual Machines
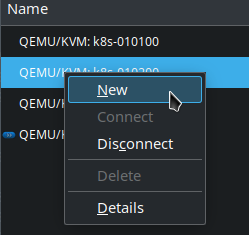
With the storage pools in place I create the first Virtual Machine. Right click on the hostname and click New:
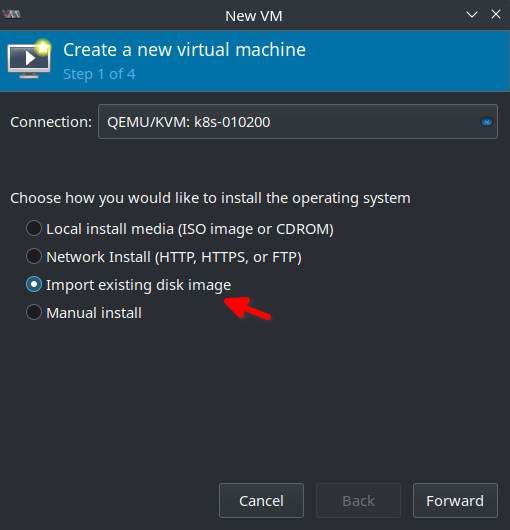
Click Import existing disk image:
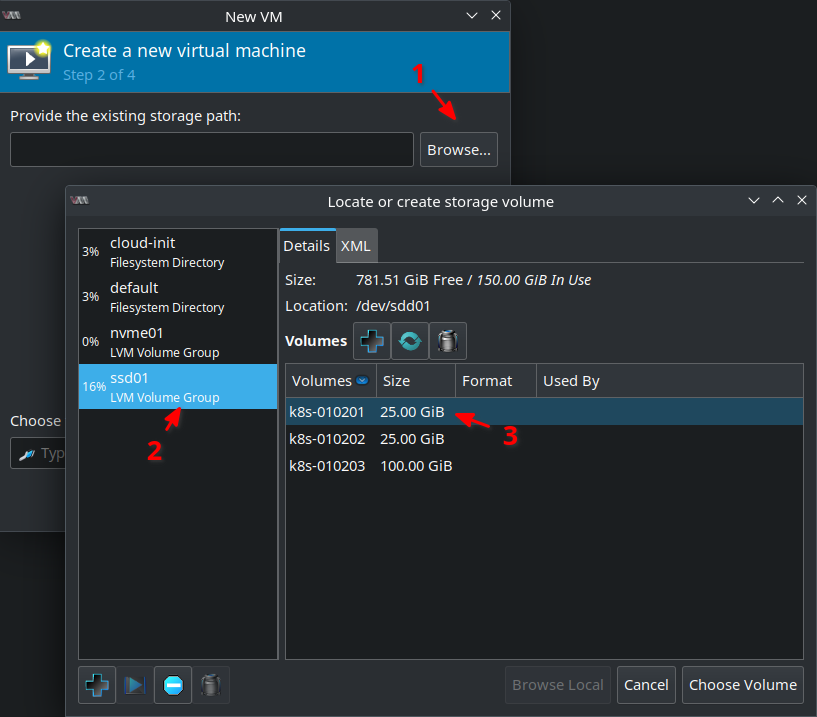
Click Browse and select Storage Pool ssd01. Select the first volume k8s-010201 and finally Choose Volume:
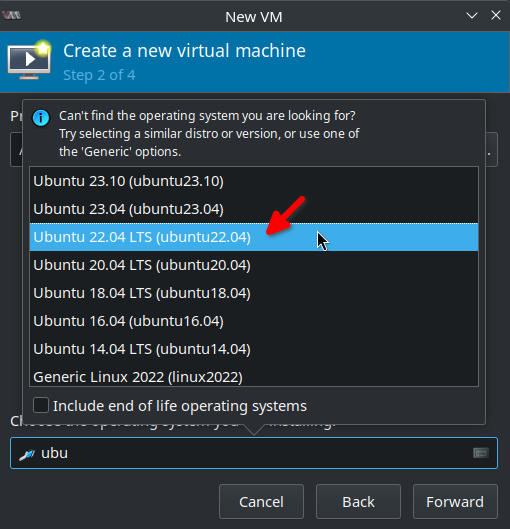
In the text box below type ubuntu and select Ubuntu 22.04 LTS. But it should be also okay to select an older version or Generic Linux if your version is not available:
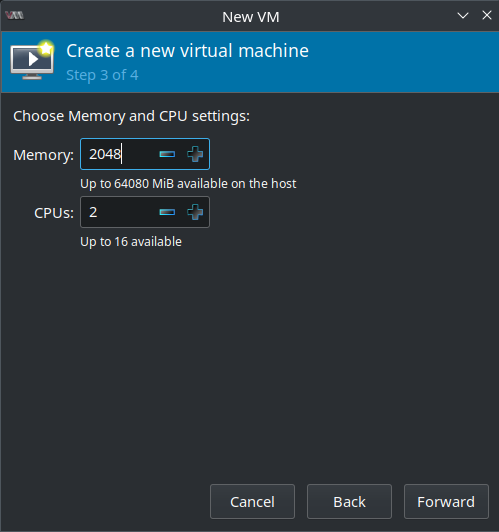
I’ll assign 2 GByte of memory and 2 CPUs to the VM:
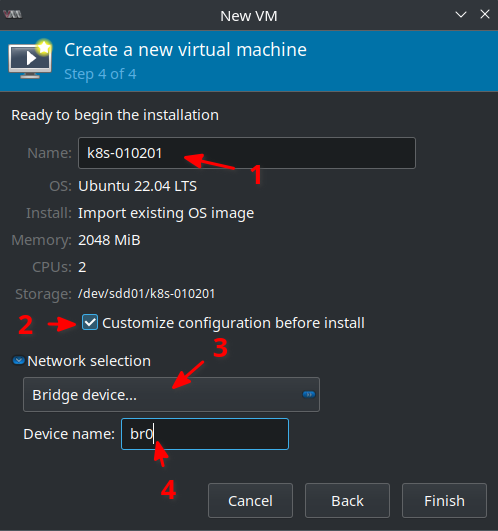
Next give the VM a name which is k8s-010201 in my case. It’s important to select Customize configuration before install as some adjustments must be still made! In the Network selection drop-down select Bridge device... and as Device name enter br0 (that’s the network bridge I created in one of the previous blog posts):
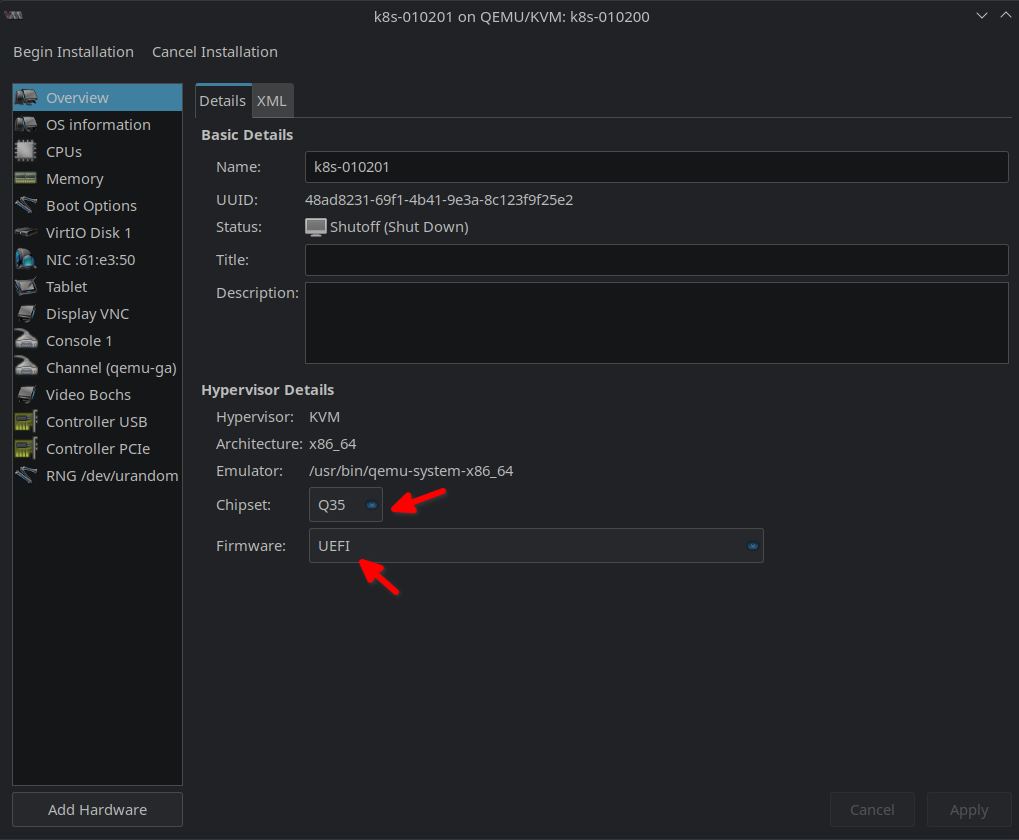
In the next screen make sure that Chipset is Q35 and Firmware UEFI in the Overview tab:
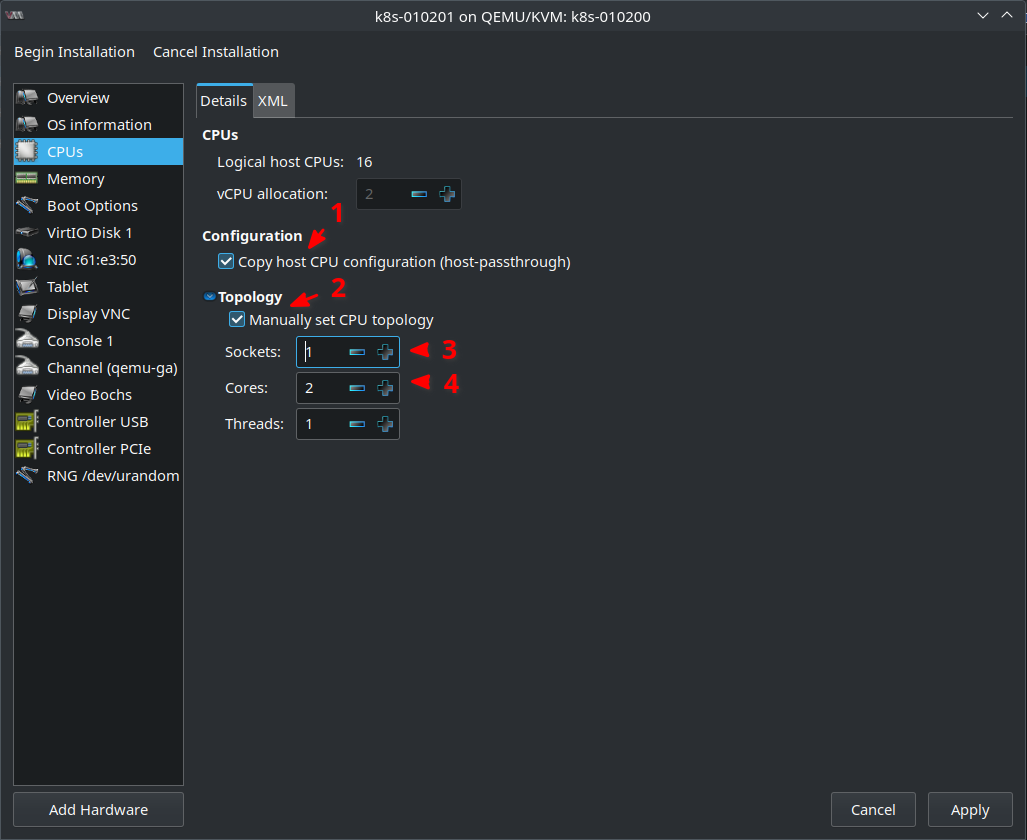
In the CPUs tab choosing Copy host CPU configuration (host-passthrough) makes sense to get the best performance. If you plan to migrate VMs between hosts that don’t have the same CPU then this option can’t be used and you need to select a generic CPU model that best matches your CPU. I also set set Sockets to 1 and Cores to 2. This fits more the CPU topology my Physical Hosts actually have. But actually this is a little bit more complicated topic. Playing around with CPU pinning and processor affinities might have positive or negative performance effect. If you want to do that please read Setting KVM processor affinities for more information. I’ve also written about it in my blog post Linux, AMD Ryzen 3900X, X570, NVIDIA GTX 1060, AMD 5700XT, Looking Glass, PCI Passthrough and Windows 10. But for now lets go with these settings:
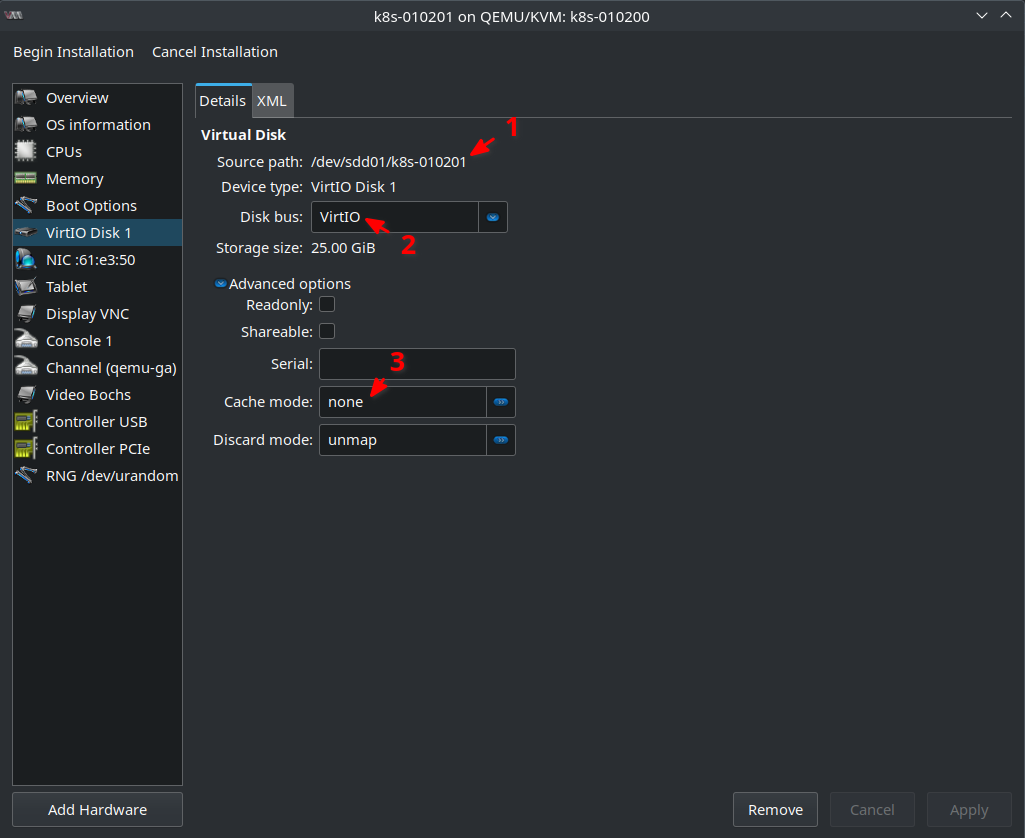
Next make sure in the VirtIO Disk 1 tab that the Source Path is correct and that Disk bus is set to VirtIO. This is needed to have best Disk IO performance. Also Cache mode should be set to none in case of VirtIO and LVM. The host OS has already a Disk IO scheduler configured. So there is no need for the VM to cache anything. The host OS should know better and this also avoids having two IO schedulers “fighting” each other:
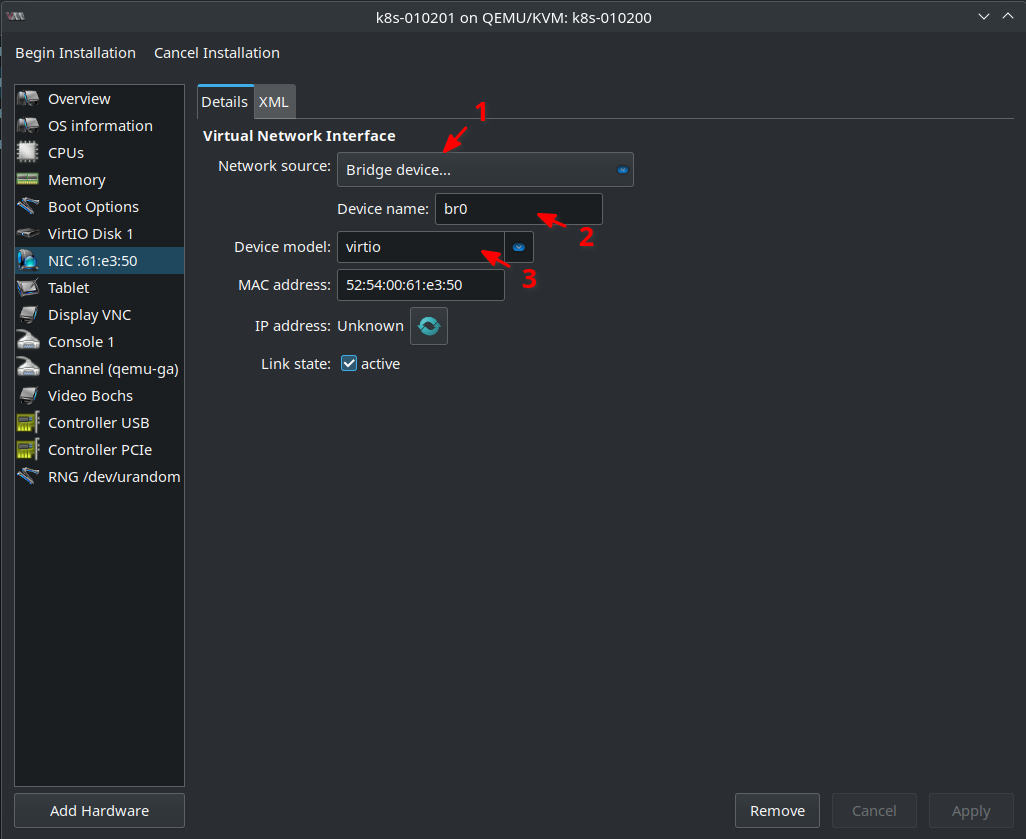
Also check in the NIC ... tab that Bridge Device is still set to Device name br0. Device model should be also virtio for best network performance:
As mentioned in my previous blog post cloud-init searches for a CDROM with label cidata. That’s the .iso files as you might remember with the configuration data cloud-init needs. So lets Add Hardware on the lower left side and click Storage tab. As Device type select CDROM device. Select or create custom storage should be already chosen. Click Manage ... and select from cloud-init Storage Pool the .iso file that belongs to the VM you want to create:
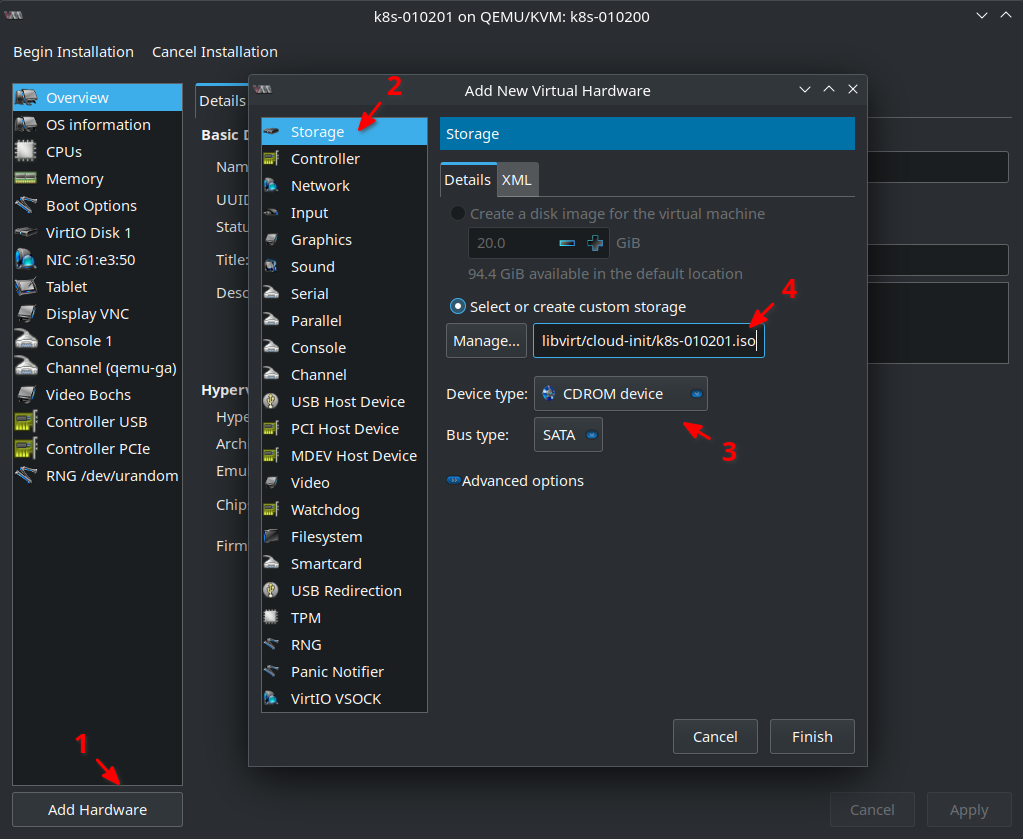
Begin Virtual Machine installation
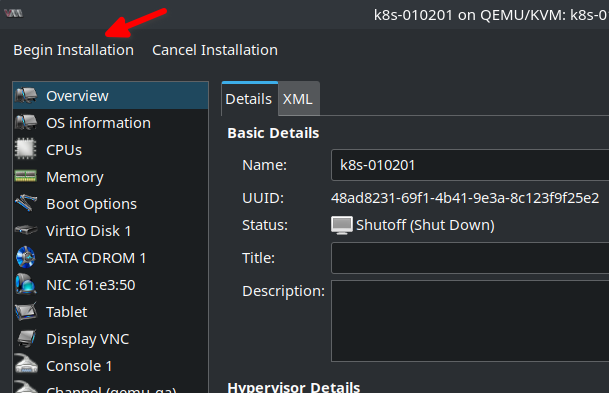
Now the VM can be installed by clicking Begin Installation at the top right corner:
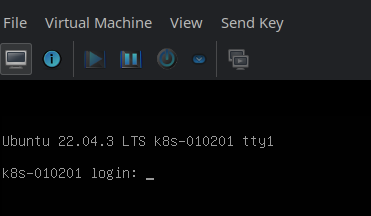
A few seconds later you should see the console with the login. If you haven’t set a password (that’s what I did in the previous blog post) then a login is not possible here. Instead I configured cloud-init to add a SSH key and since SSH daemon is started by default on the Ubuntu Cloud Images I can login via SSH now and my first VM is ready 😄
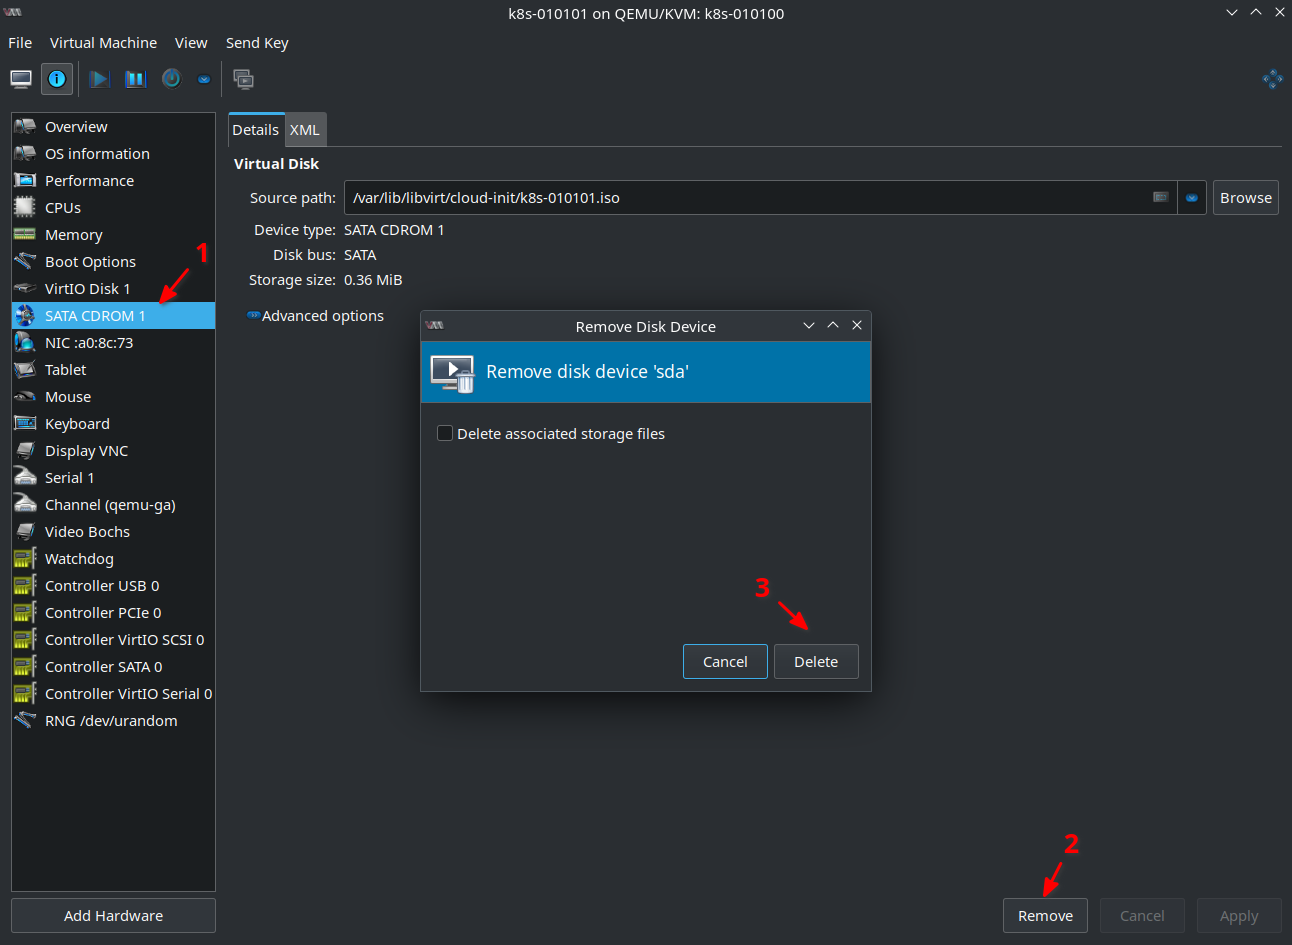
Remove CDROM (if no longer needed)
If you don’t need cloud-init anymore you can remove the CDROM from the VM configuration. This is what I did since any further OS configuration on the Virtual Machine is done via Ansible. So cloud-init and Ansible might interfere and that’s something I want to avoid:
But of course you can add the CDROM any time later again e.g. to add a password for a user if needed. You just need to remember that in this case the password will be set “forever” so to say and you have to remove it manually if no longer wanted or needed.
You can also keep the CDROM as it doesn’t contain any security related information. But this is only true if it doesn’t contain any password! If you want to keep the CDROM you can disable cloud-init by running sudo touch /etc/cloud/cloud-init.disabled. There’re other possibilities too. Please read How to disable cloud-init.
Final (optional) steps
If all VMs are now installed and configured I normally do three more things before proceeding:
- Run
apt update && apt upgradeto update all packages to the latest version. - Create DNS entries for all VMs.
- Install the VERY latest Linux Kernel provided by Ubuntu. As long as you don’t intend to run something proprietary like an Oracle Database there is normally no problem to do so. In my use case with the Kubernetes Cluster it’s even better to have a newer kernel. E.g. I use Cilium for all network related Kubernetes topics. That one depends on eBPF. It’s around for a while but got lots of attention the last few years.
eBPFis part of the Linux Kernel and newer versions implement new features and extend existing ones constantly. SoCiliumprofits a lot from newer kernels. Newer kernels are provided by Hardware Enablement (HWE) stack. The Ubuntu LTS enablement, or Hardware Enablement (HWE), stack provides the newer kernel and X support for existing Ubuntu LTS releases. There are two packages available:
apt search linux-generic-hwe-22.04

linux-generic-hwe-22.04/jammy-updates,jammy-security 6.2.0.39.40~22.04.16 amd64
  Complete Generic Linux kernel and headers

linux-generic-hwe-22.04-edge/jammy-updates,jammy-security 6.5.0.14.14~22.04.6 amd64
  Complete Generic Linux kernel and headers
As you can see the first one provides Linux 6.2.0 and the edge one provides 6.5.0. I normally always install the edge version. The 22.04 HWE stack follows the Rolling Update Model. That means that at some point in time Ubuntu might introduce Linux 6.6.0 or 6.8.0. Linux 6.6 is the current kernel with long term support (LTS). So maybe you might get an upgrade to that version in the future. But if you are uncertain just stay with the kernel Ubuntu provides by default.
That’s it! If you made it that far: Happy VM managing! 😉